A cooking, family, and beauty blog. I blog about my occasional creativity. I use this as my outlet to share what I am excited about as I am usually experimenting with beauty and food techniques that inspire me.
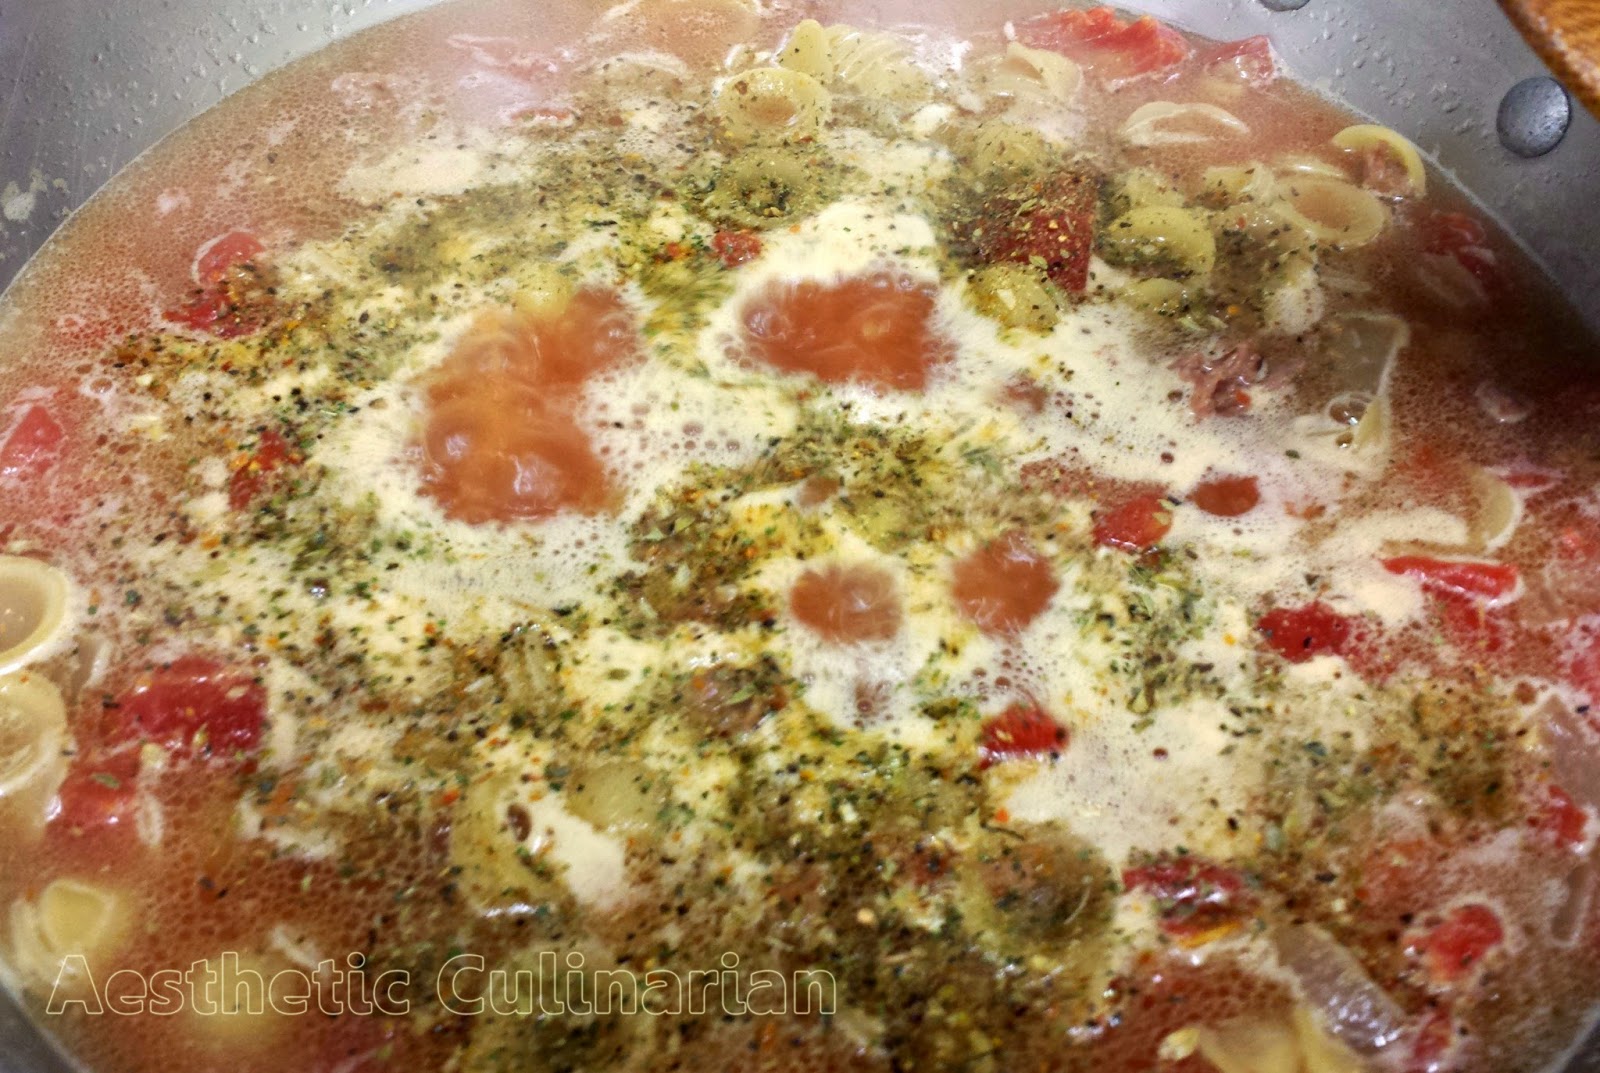
I have come across many recipes incorporating "the nutritional powerhouse" known as kale. I did some research on what the hype is about kale and the findings were unbelievable. Kale provides so many nutrients and vitamins and provides many health benefits by eating it regularly as quoted in this article as well as countless others praising its value. I finally gave in when I was grocery shopping and found some kale at an unbelievable sale price. At first, I didn't have any idea what to do with it or what it tasted like but after finding the many unique ways to include it in meals, I have been adding it to salads, smoothies, soups, and pasta dishes. I have even roasted it which was yummy and next, I want to try it grilled in the summer months. Last night, I was trying to figure out what to make that was quick and easy with ingredients. I had kale, cheese, sausage, and some pasta so I threw it all together in one pot and cooked it up. The results were insanely delicious and the family loved it. I will share the recipe in hopes that your family will enjoy it as well.
Ingredients: 1 lb of Beef smoked sausage casings removed 1 lb uncooked pasta (I used Orecchiette pasta) 4 cups chopped kale 1 cup of shredded mozzarella cheese 1 can diced and fire roasted tomatoes with green chiles (14.5 oz) 1 small onion chopped 2-3 large garlic cloves minced 1 tbsp olive oil 2 cups chicken broth (I use Better than Bullion mixed with warm water-follow product directions) 1 tsp basil 1 tbsp garlic powder 1 tbsp 21 seasoning salute 1 tsp oregano Sea salt & fresh ground pepper to taste Method: In a large skillet or wok style pan, heat olive oil and add the onion and minced garlic. Saute the onion and garlic until onion is clear then add the sausage. Break up sausage into smaller pieces with a wooden spoon and saute until meat is brown. Add broth, tomatoes, and spices and mix until boiling and then add the pasta and return to a boil. Reduce heat and cover until pasta is cooked (about 10 minutes). Once pasta is cooked, mix in kale one cup at a time making sure each cup is mixed in. Cover and cook for an additional 5-10 minutes depending on your cooked kale preference. Add cheese and heat covered for an additional 5 minutes or until cheese is melted. Remove from heat and serve.
You will love the ease of cooking this in one pot and the of course the flavorful and healthy meal option. Enjoy!
Today, I would like to share a favorite that my husband and I love to enjoy when we're having breakfast alone or with our adult family and friends. It is a very spicy meal that is not very kid friendly so we avoid making this into a family dish. We discovered it a few years ago when my husband visited Australia. He brought back the MasterChef Australia cookbook and we discovered some unique recipes that created some mouth watering cuisine. One of those was Chris' Eggs in Hell recipe presented by Chris Badenoch from MasterChef Australia. We tweaked the recipe to suit our taste and it is just phenomenal. The key is the hot pepper sauce to make the "hell" part. We prefer Red Rooster Louisiana hot sauce for our recipe but your favorite hot sauce should work. Here is the recipe for you to try.
Ingredients: 1 tbs hot pepper infused olive oil 1 medium onion, finely chopped 2-3 garlic cloves, minced 1-2 roasted garlic, chopped 1 shallot clove, finely chopped 4 large tomatoes, diced 4 eggs 1 tbs 21 Seasoning Salute 1 tbs garlic powder 1/3 cup of white wine 2-3 tbs hot sauce (adjust to your heat preference for the hell part) 1/2 cup grated cheese of your choice 2 slices of cooked bacon (optional) 1 thick slice of bread, cut into strips (optional)
Sea salt and freshly ground pepper to taste
Method: Turn on broiler on high to pre-heat. Heat oil in a frying pan and stir in onions, shallots, and garlic, until softened and clear. Add diced tomatoes, roasted garlic, 21 Seasoning Salute, garlic powder, white wine and slow simmer until the tomatoes are pulpy (about 15 minutes). Season with sea salt and freshly ground pepper and stir in the hot sauce and simmer for another 5 minutes. Place the tomato mixture in small heat-proof bowls. Make a small opening in the middle of the tomato mixture and crack 1-2 eggs in the opening. With a spoon, gently cover the eggs with the tomato mixture. Place the bowls on a cookie sheet and broil for 4-5 minutes or until eggs are no longer clear. Remove bowls from broiler and top with cheese. Broil for an additional 3-4 minutes or until cheese is golden. For bacon and fried bread sides: Cook bacon until crispy. Using the same frying pan, fry the bread in the bacon fat until crisp. Serve immediately.
You will definitely be pleased with spicy breakfast dish. It satisfies our spicy food cravings any time of the day. I hope you enjoy it as much as we do!
This is not your average canned tuna recipe. I was always a huge fan of tuna salad sandwiches. One day, I was making myself a tuna sandwich for lunch and my husband happened to walk in the kitchen as soon as I started opening the can of tuna. It was clearly obvious that I was about to make myself a tuna sandwich by the sight of the jar of mayonnaise and the usual ingredients. He is not a fan of tuna fish sandwiches so he stopped me before I did my usual preparation routine and he started pulling ingredients out of the fridge. He knows I like tuna so he wanted to find alternative and easy ways to prepare canned tuna to blend the flavor with some tasty ingredients to make it more like a gourmet dish. He is great at finding just the right ingredients to make dishes taste out of this world. Since he has such creative cooking techniques, he created a Mexican style spicy tuna dish and a Mediterranean spicy tuna dish. Both are phenomenal. I have attempted to duplicate his recipe for lunch today. Here is the recipe for the Mexican style spicy tuna skillet meal.
Ingredients: 1 can of tuna packed in water - drained 1 tbs Lemon infused extra virgin olive oil 1 tbs Hot pepper infused extra virgin olive oil 1/2 medium onion chopped 1 medium shallot chopped 3 garlic cloves minced 3 yellow peppers sliced (seeded or de-seeded depending on your heat preference) 1 roma tomato chopped (can substitute for canned tomatoes) 1/2 cup tomato sauce 1 tsp chili powder 1 tsp cayenne 1 tbs Chili Garlic Sauce (I was all out so I used Sriracha sauce) 1 tbs 21 seasoning salute 1 tbs garlic powder Salt grinder Pepper grinder Lime wedges Chili pepper Method:
Heat oil blends in a medium pan on medium heat
Add the the onion, garlic, and shallots. Sauté until softened.
Add the yellow chiles and sauté just to coat the chiles with the oil
Add the chili powder and mix with the ingredients in the pan and stir until chili power is scorching lightly
Add the tomatoes, sriracha, and crushed red pepper and stir until softened
Stir in the tomato sauce and mix well. Sauté until tomato sauce scorches a bit
Add the garlic powder, 21 seasoning salute, and cayenne
Add the tuna and coat well with sauce leaving some chunks of tuna in the mix. Let it simmer for about 2 minutes.
Pull from heat and serve hot over brown rice, white rice, or pasta
Add salt and pepper to taste and stir
Serve with lime wedges and sprinkle with chili pepper
Be careful. This dish is very spicy hot but delicious. You can add or reduce heat by adjusting the ingredients.
Well, I would have to say that the recipe was a success. I was pleased with the spicy and tangy flavors. I almost forgot I was eating canned tuna. I will post the Mediterranean recipe on a later post. Hope you enjoy this dish!
I am on a healthy cooking kick for the moment. It's the start of the new year and it's time for a fresh start. First thing to fix is that I know that I have not been incorporating many vegetables into our family meals so I want to change that. I went in search of some healthy vegetable recipes that will make the veggies edible for my picky 8 year old and we can all enjoy and leave them craving more. My 14 year old daughter and my 5 year old love all fruits and veggies but I can't seem to entice my 8 year old to eat anything except broccoli, corn, and peas and she can only eat them if they're smothered in butter, salt, and pepper. I found some roasted vegetable recipes that sound amazing and flavorful. I decided to try some out last night to serve with left over spaghetti. I love zucchini and carrots and I had those in my fridge but I would like to try a variety of vegetables such as asparagus, brussel sprouts, cauliflower, and even our family favorite, artichokes. Oven Roasted Vegetables: Ingredients:
Sea salt grinder Method: Preheat oven to 375 degrees. Quarter veggies. In a small bowl, combine oregano, basil, 21 seasoning salute, parsley and garlic powder with a fork or whisk. Line a cookie sheet with parchment paper and add the veggies to the tray. Brush the oil lightly on each piece until coated. Sprinkle the spice combination on each piece to coat evenly. Grind the lemon pepper and sea salt over the veggies to taste. Place in oven and roast for 30 minutes or until desired tenderness and toss the veggies half way through cooking.
The zucchini and carrots tasted delicious. The spices and lemon flavors gave them a richer flavor while still keeping them healthy. You can substitute and add any other spices you like for taste. I experimented with another batch that made them spicier by adding cayenne pepper and crushed red pepper and threw in some minced garlic and they were fabulous. I did not share this batch with the kids since they are not fans of spicy but I loved it. Enjoy your veggies.
I can't believe it's been a week since we hosted our daughter's Minecraft themed birthday party for her 8th birthday. It was such a fun adventure planning, building, and executing the event. The party was a hit. 18 kids joined us in making a Minecraft world come alive for our daughter: the Minecraft enthusiast. The initial party planning phase was researching on the web for ideas on how to make it an amazing celebration for my daughter and her guests. After the research phase, my husband and I made a game plan with what we pinned and bookmarked from other parent blog sites who were kind enough to share their experiences and printable material. We were thankful for these sites since Minecraft party supplies are very hard to find. Our game plan:
Piñata - Our daughter is obsessed with Herobrine so I decided to tackle making her the Herobrine piñata. This task took 2 days of constructing and decorating. You can visit my previous post for step-by-step instructions on the making of the Herobrine piñata.
Treat bags - To match the theme of the Herobrine piñata, I made Herobrine treat bags. I used brown lunch bags and cut them down to a more uniform square shape and pasted brown tissue paper squares for the hair and beard and assorted skin colored tissue paper squares for the face. I used white construction paper rectangles for the eyes. I also made creeper bags. I found green treat bags at the Dollar Tree and cut them down to match the shape of the Herobrine bags. I used a creeper sticker similar to the one on this link that I had on hand for the pattern. I took construction paper and an exacto knife to cut out the pattern and then drew each one in with a black sharpie. I considered using paint or spray paint however I did not have them on hand though I am sure they would work as well.
Treat bag goodies - We bought Brach's caramel squares, Dubble Bubble gum squares, Twizzlers, Pop Rocks, and Swedish fish for the goodies. We included dinosaur erasers that we found at Target with a pack of 8 erasers for $2.00 (my daughter assures me that there is a dinosaur mod in the game). We also made special keepsake treats.
Stickers - On this particular amazing blog, we found many printables to use for our party. We went to the local print shop and printed out stickers and cut them.(Link to stickers)
Bookmarks - On this same site, we found printable Minecraft bookmarks and had those printed at our friend's printshop on custom card stock paper.(Link to bookmarks)
Chests - We also decided to make mini chests to include in the goodie bags. We printed those on card stock paper in color. Since my husband is the detail oriented crafter, he was in charge of cutting and assembling the chests. These were a little more time consuming but well worth it. We found this chest papercraft from Google images but there are many others you can try.
Once the crafting and treats were done, our next goal was to organize the party activities that would keep the children entertained during a 2-3 hour time frame. Our daughter was more than happy to put together a playlist on Youtube because she wanted to hear her favorite Minecraft parody songs during the party.
Minecraft party playlist:
The party schedule:
Free play/snacking: 30 minutes while the guests arrived. There was a huge grass area for the kids to run around on and a playground. We set up 2 tables; one for the food, gifts, and cake and one for the crafting activity and lunch time. We set out snacks and drinks for the kids and labeled the table with Minecraft food tags (unfortunately, we do not have pictures of this set up as our photos of the table were inadvertently deleted. Talk about a blogger's worse nightmare).
The food table:
Deviled eggs - Gold
Black olives - Coal
Yellow apples - Golden apples
Veggie tray - Carrots
Twizzlers - TNT
Swedish fish - Fish
Birthday cake - Cake (Not for snacking)
Water
Juice boxes
Musical Minecraft: For this activity, we printed out coal blocks on card stock paper and set them out in a circle, one for each child minus 1. We played "Minecraft Style - Parody of Gangnam Style" and played it like the classic musical chairs but instead they had to be standing on a coal block when the music stopped. The kids went wild over this game.
Minecraft Papercraft - We printed out papercraft characters and mobs in the game for the kids to choose their favorite character. We brought kid's size scissors and glue sticks for them to assemble their 3D papercraft. For those that did not finish before lunch, we handed out bags with their names on them to take home the pieces and finish them at home. Here is the link to the site where we found the printables.
Lunch - We served pizza for lunch. My daughter requested specialty ordered pizzas: Bacon and pineapple, black olives and pepperoni, and cheese pizzas.
Cake - Auntie made a Creeper cake. She used green fondant icing with chocolate cake and chocolate chips. She calls it "Death by Chocolate" Creeper cake. She also baked a Minecraft pig, TNT, and ocelot out of clay and hand painted them for the cake toppers. It was a great cake.
Pin the tail on the Ender Dragon - We printed out the Ender Dragon game on glossy photo paper and pasted it on a white poster board. We also cut out the individual tails. When we handed each blind folded child their tail, we wrote their name in chalk and stuck double sided tape on the backs so they would stick on and stay. Game boardTails
Piñata/Treat bags - We did the traditional smallest to biggest child in line and the birthday girl was first up. All of the kids were able to hit it at least once and due the sturdy box material, we had to help it along a bit for the treats to come out. We filled it with fruit snacks, granola bars, snack sized cookie bags, and lollipops. We then handed out the treat bags and each child got to choose between Herobrine or Creeper.
Game Prizes:
Minecraft stickers left over from the treat bags
$1 Target bin treats
TNT bundles - We made these by bunching 16 Twizzlers and wrapping them with a TNT label. We then cut pieces of gummy candy and stuck them at the bottom of each Twizzler piece. We then poured Pop Rocks inside the Twizzlers and then capped the other end with a gummy piece of candy. This created a pop on their tongues simulating a TNT explosion.
That concluded the party. Mom, Dad, and birthday girl thanked our guests for attending and said our goodbyes. It was an exciting day and the feeling of actually making your own the party favors and treats really makes the experience much more fulfilling. Our daughter expressed how much she enjoyed her party and said it was the best party ever. We hope this post helps with your party planning and hosting.
*Stickers, bookmarks, Pin the tail on the Enderdragon game and tails print outs are the property of and hosted by http://ichooseawesome.wordpress.com/.